5 Ways to Create Beautiful Photos for Your Site
by Dan Cavallari
We all love photos: action shots, product shots, even just simple headshots of employees. They dress up your website and give your customers a sense that you’re a real place filled with real people who do real riding. So you grab your camera, point, shoot…and the photos look awful! Over-exposed, under-exposed, blurry—why even go through the trouble?
Because photos aren’t just nice. They’re vital to your online business. The benefits of photos far outweigh the struggle to take them, but guess what? Taking the photos doesn’t have to be a struggle at all! Here are five ways to simplify your bike shop photography, as well as a few tips on how to take photos your customers will love.
1) It’s all about the light! Ask a pro photographer what their most important piece of equipment is, and they will tell you it’s their eye. Looking for good light is the best way to improve your photos. That may mean using natural light, or buying a flash if you can afford it, but if you’re looking for an inexpensive way to light your shop and take photos that will get noticed, go to your local hardware store and buy a work light like this one: LINK. They’re cheap, bright, and they throw off a lot of light. Even better, they throw off a really warm (orange) light that can make for super interesting photos.

If you don’t think you’re ready to play with flashes and lights, remember this rule of thumb: when indoors, look for natural light from windows or skylights; when you’re outdoors, look for shade. If there’s no shade, keep the sun BEHIND your subject. Nothing looks worse than people squinting against the sun!
2) Get high…or low. If you’ve ever been to Disney World, you know the trick that Cinderella’s Castle plays on you. It’s called forced perspective, and it basically means that the castle was built to look taller based on the angle at which you look at it. You don’t need to get quite so fancy with your photography, but consider looking at your products and your shop from a different angle. Get up on a ladder and shoot down at your shop with a wide angle lens if you have one. That gives a massive, sweeping view of your space. Or, try getting on the ground and shooting up at the front of that new fat bike you just got in. It will make the bike look larger than life!
3) People over product. Your customers definitely want to see your goods, and they want to know what you have in stock right now, but they also want to know you’re real people who ride bikes, fix bikes, love bikes, and generally live and breathe bikes! So get your mechanics in the shot. Ask your salespeople to show off that new derailleur or hot new jersey.

Generally, people feel awkward when they’re posing for photos, but a simple trick to get them to relax is to give them something to hold. Giving them a pair of shoes to show off automatically puts them at ease, so it’s win-win: you get to showcase new product, you get people in the shot, and everyone’s happy during the process.
4) The camera doesn’t take the photo; you do. In other words, get out of Auto! Okay, a caveat: if you’re only comfortable with your point-and-shoot camera, that’s cool, you can still take great photos. But if you’ve got a fancy DSLR camera and you’re only shooting in Auto mode, you’re missing out. So turn that dial and start playing with different settings and see what you and your camera are really capable of.
Well where do you start? Maybe you don’t want to dive into full manual mode, but you can start by experimenting with your white balance settings. You know, those little pictures of a light, a cloud, and even the letter K? Switch it to K (which stands for Kelvin) and try adjusting the setting until you see something you like. A higher number means a warmer-looking photo, while a lower number cools down the photo and makes it look more blue.
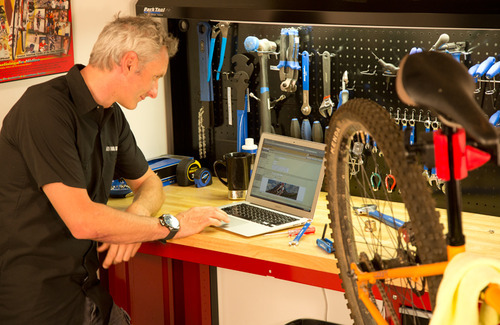
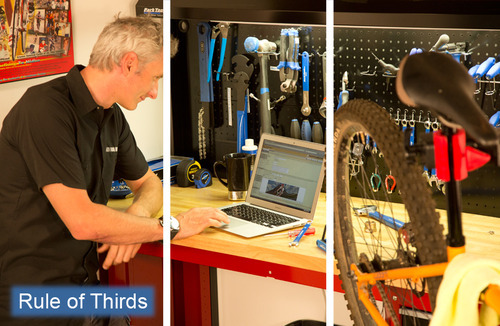
5) No, really. The camera doesn’t take the photo. You do! Remember that pro photographer who said his most important piece of equipment is his eye? It’s not just for light. Composition matters! Know the rule of thirds: the most visually interesting photos often place the subject in one third of the photo, not the entire photo. Try placing a derailleur on a tabletop, but instead of putting it in the center of your photo, place it off to the left side. When you’re taking a photo of your shop, put your most interesting-looking mechanic in the right third of the photo. This showcases more of the scene, and it draws the viewer’s eyes to different parts of the photo rather than just the center.

You May Also Like
These Related Stories

Holiday 2025 Marketing Playbook

Summer 2024 Marketing Playbook

.png?width=1676&height=300&name=WS_Logo_full_blue%20(1).png)
Comments (2)